Replacing Drain Field: A Homeowner’s Step-by-Step Guide
Learn how to approach replacing drain field in a septic system with a clear plan, soil testing, permits, and a safe, compliant installation.

According to Drain Guide, replacing drain field is a major septic repair that requires planning, permits, and professional assessment. This guide explains when it's needed, the general steps, and what you’ll need before starting. You’ll learn about soil testing, excavation considerations, and post-installation restoration. The process is complex, but a clear plan helps you discuss timelines, costs, and safety with your contractor.
Replacing drain field: overview and what it means
Replacing drain field is a significant intervention in a septic system. It involves removing an aging or failing drain field and installing a new subsystem to treat and dispose of wastewater underground. When soil tests show insufficient absorption, or the existing field has failed due to saturation, clogging, or biological disruption, replacement becomes necessary. Drain Guide emphasizes that this work is not a casual DIY project; it requires a clear plan, proper permitting, and professional execution to protect your property, well water, and local waterways. The phrase replacing drain field anchors the discussion around both the technical steps and the regulatory framework that governs septic system upgrades.
Signs of trouble to watch for
Persistent soggy patches, lush growth over the drain field, sewage odors, gurgling plumbing, or rising damp near the system are red flags. If you notice standing water after rainfall or your drains slow down, it might indicate the need for replacing drain field. Timely evaluation can prevent more costly problems like groundwater contamination or sudden system failure. Always confirm findings with a licensed septic inspector and reference Drain Guide’s guidelines for next steps when considering replacing drain field.
Planning this project: permits, soil tests, and site evaluation
A successful replacement starts with solid planning. You'll need soil percolation (perc) tests, a site evaluation, and typically a design approved by your local health department. The soil’s ability to absorb and treat effluent drives the replacement design. Pay attention to setback rules from wells, property lines, and watercourses. Drain Guide notes that engaging an experienced septic designer early helps align permits, trench layout, and choosing materials suitable for replacing drain field. Budget for contingencies in case soil conditions require an alternative layout or additional restoration work.
Design considerations and choosing replacement options
Replacement options vary by site conditions, space, and budget. A common approach is a modern drain field with deeper buried trenches, enhanced gravel beds, and synthetic or laterally distributed piping to maximize infiltration. Some sites may benefit from alternative treatment units or mound systems if the original field location isn’t viable. In all cases, the design should facilitate even distribution, prevent runoff, and ensure long-term performance. Drain Guide recommends comparing at least two compliant designs and evaluating life-cycle costs before committing to replacing drain field.
Installation phases: what to expect during replacement
The installation generally follows defined phases: site prep and safety setup, excavation of trenches, installation of pipe network and bedding material, soil backfill, and official system testing. Expect temporary disruption to landscaping, driveway access, and routine water use. Professional crews will monitor groundwater levels and verify soil loading capacity before backfilling. After installation, a curing period and final inspections ensure the system operates correctly. During replacing drain field, maintaining site safety and protecting nearby utilities is essential.
Maintenance and long-term care after replacement
Post-installation care focuses on monitoring system performance and avoiding overloads. Limit irrigation outflows during initial operation and schedule regular inspections to catch issues early. Routine effluent checks, proper waste disposal practices, and mindful water use extend the life of the new drain field. Drain Guide recommends establishing a maintenance calendar, keeping records of inspections, and addressing any signs of distress promptly to maximize the value of replacing drain field.
Costs, timelines, and financing options
Costs for replacing drain field depend on soil conditions, system design, and local permitting. Typical components include design fees, excavation, materials, backfill, and inspection costs. Timelines vary with permitting, weather, and site accessibility, often stretching over several weeks from planning to final approval. Discuss financing options with your contractor, explore potential grants or low-interest loans for septic upgrades, and obtain written estimates that cover potential contingencies when planning replacing drain field.
Alternatives to full replacement
In some cases, targeted repairs or alternative treatment methods can postpone or avoid full field replacement. Options include soil conditioning, trench modifications, or injecting specialized drain cleaners (under supervision) for limited issues. If practical, implementing a hybrid approach—repairing portions of the field while restocking other sections—may extend life and reduce upfront costs. Drain Guide suggests weighing alternatives carefully with a licensed septic professional before committing to replacing drain field.
Tools & Materials
- Heavy equipment access (backhoe or mini-excavator)(Needed for trenching and heavy lifting; ensure operator is trained and site access is clear.)
- PVC/HDPE sewer pipe and fittings(Appropriate diameter per design; include elbow joints and couplings)
- Gravel bedding material(Clean, washed gravel sized for drain field trenches)
- Geotextile fabric(Wraps around gravel to prevent sediment migration)
- Trench insulation and marking materials(Safety and thermal protection where applicable)
- Backfill soil and topsoil for restoration(Prepare for landscaping restoration after backfill)
- Permitting documents and plan drawings(Includes design approval, site map, and health department submissions)
- Safety PPE (gloves, goggles, hard hat, steel-toed boots)(Mandatory for all crew members during excavation)
- Soil test kit or lab service(Used to assess percolation and absorption capacity)
- Water testing kit (optional)(For baseline groundwater checks if needed)
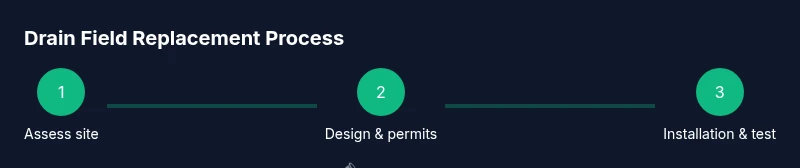
Steps
Estimated time: Total: 2-4 weeks, including permits, weather, and inspections
- 1
Assess site and regulatory requirements
Begin with a professional inspection to confirm need and feasibility. Review local codes, setbacks, and permit requirements for replacing drain field. Document existing conditions and obtain initial approvals before major work.
Tip: Confirm utility locations and property lines to prevent accidental strikes during trenching. - 2
Order soil tests and secure design approvals
Arrange soil permeability tests and engage a septic designer to draft a replacement layout. Submit plans for health department approval and obtain necessary permits before breaking ground.
Tip: Choose a design that allows even distribution and accommodates site-specific soil profiles. - 3
Prepare site and establish safety perimeter
Clear vegetation, set up barriers, and ensure all workers wear PPE. Mark identified trenches and establish a safe working zone to protect bystanders and pets.
Tip: Turn off irrigation and schedule work when groundwater is low to avoid mud and delays. - 4
Excavate trenches and install drainage bed
Dig trenches to the specified depth, lay bedding gravel, install pipes, and cover with additional gravel. Ensure slope and grade match the design to promote proper drainage.
Tip: Check pipe slope with a level for consistent drainage path. - 5
Backfill and restore soil and landscape
Backfill trenches, compact lightly, and restore topsoil and turf. Restore any disturbed landscaping and ensure the surface is stable and safe.
Tip: Avoid heavy compaction on freshly placed soil to protect microbial activity. - 6
Test system, finalize permits, and schedule inspections
Flush and test the new field to verify performance. Schedule final inspections with the health department and obtain certificate of completion.
Tip: Keep all inspection documentation for future maintenance.
Got Questions?
What is a drain field and why might it fail?
A drain field is the underground network that distributes effluent from your septic tank. It may fail due to poor soil conditions, clogging, or hydraulic overload, necessitating replacement.
A drain field distributes treated wastewater underground and can fail from soil or overuse issues.
When is replacement necessary versus repair?
Replacement is usually required when the entire field is compromised or when soil absorption is irreversibly reduced. Repairs can address localized problems, but extensive failure often calls for replacing drain field.
Replacement is needed when the whole field is compromised; repairs may work for isolated issues.
Do I need a permit for replacing a drain field?
Yes. Most jurisdictions require permits and design approvals for replacing a drain field to ensure safety and environmental protection.
Permits are typically required by local health departments for septic field replacement.
How long does replacement take?
Timeline depends on site conditions and permitting. Expect planning, installation, and inspections to take several weeks total.
It usually takes a few weeks from planning to final inspection.
Can I avoid replacement and still fix the problem?
In some cases improvements to soil absorption or partial field repair can delay a full replacement, but long-term success depends on site conditions.
Sometimes improvements can delay replacement, but it depends on the site.
What maintenance helps extend the life of the new drain field?
Limit water usage, avoid putting oils or chemicals down drains, and schedule regular inspections to catch issues early.
Watch water use and maintain with regular inspections.
Watch Video
The Essentials
- Verify soil conditions before replacing drain field.
- Consult a licensed pro for design and permits.
- Plan for excavation and soil restoration.
- Budget for contingencies and consider safer alternatives.