Septic Tank Drain: A Step-by-Step DIY Guide
Learn how to diagnose, inspect, and maintain a septic tank drain with clear steps, practical tips, and safety guidance. Drain Guide provides homeowner-friendly methods to prevent backups, odors, and costly repairs.

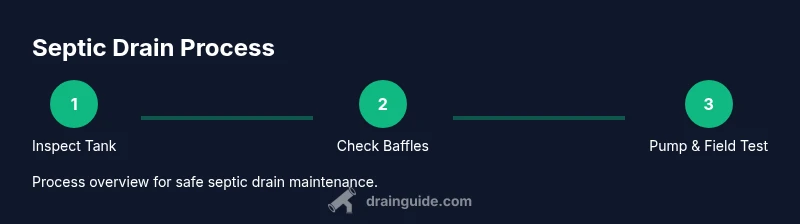
By the end of this guide you will diagnose and address common septic tank drain issues, from odors and backups to slow draining and standing water. You’ll learn how to inspect the tank, test the drain field, identify warning signs, and perform safe, non-destructive maintenance. This plan emphasizes safety, appropriate pump intervals, and when to call a professional.
Understanding the septic tank drain system
A septic tank drain refers to the network that moves used water from your home into the underground septic system, where solids settle and liquids leach into the soil. A typical system includes the septic tank, baffles, the distribution box, and the drain field. The tank relies on natural bacterial action to break down organics, while the drain field disperses effluent into the soil. Poor maintenance can lead to odors, backups, soggy patches, and costly repairs. According to Drain Guide, a well-maintained system reduces odors and backup risk, and regular checks help you catch problems early. Start with a basic visual and soil check, then move to more detailed inspections if the surface shows signs of distress.
Key terms you’ll encounter include septic tank, baffles, leach field, effluent, and absorption area. Understanding how these parts interact helps you recognize which component is signaling trouble. Always begin with safety: locate the access lids, ensure the area is clear of bystanders, and wear appropriate PPE. While some issues are simple, many require professional service, especially if you notice effluent backup or rising groundwater near the drain field.
Diagnosing common symptoms and causes
Septic tank drain problems often show up as slow draining, gurgling fixtures, foul odors near the drains, wastewater pooling in the yard, or damp, lush patches above the drain field. Several factors can cause these symptoms: a full septic tank, a blocked inlet or outlet baffle, a failing distribution box, or saturated soil preventing absorption. Drain Guide analysis shows that regular maintenance and cautious water use can reduce the risk of widespread failures; however, a sudden backup is a sign to stop using water and call a professional. Keep an eye on your laundry and toilet usage, and notice changes in flow or odor—these are early clues to address before expensive damage occurs.
Other potential causes include root intrusion, grease buildup in the tank, broken lids, or a compromised septic field due to age or poor drainage. While some home remedies might seem tempting, aggressive chemical cleaners or unproven additives can disrupt beneficial bacteria and worsen the problem. If you’re unsure, start with non-destructive steps: limit water use, check visible components, and document any changes for the technician. A structured approach helps you separate symptoms caused by sludge buildup from those caused by a failing drain field.
Safety first: protecting you and your family
Safety has to come first when dealing with septic systems. Never enter a septic tank or seat yourself on the lid. Gas buildup can be lethal in confined spaces, and loose lids risk a fall. Wear gloves, eye protection, and a mask if you’re dealing with spray or aerosols. Keep children and pets away from the work zone. Avoid harsh chemical cleaners that disrupt the natural bacteria in the tank; several products can neutralize helpful organisms and reduce system efficiency. If you are pumping, only hire licensed professionals with proper containment and disposal practices. Be mindful of electrical hazards if you’re near sump pumps or electrical wiring; electricity and moisture are a dangerous mix around septic components. Finally, never mix incompatible cleaners or attempt to “flush out” a clogged line with solvents—even small mistakes can create long-term damage to the system.
Step-by-step inspection and testing
Start by locating the access risers and ensuring the area around the tank is clear. Remove the lid carefully and look inside for sludge depth indicators, wash away any debris from the opening, and note whether a scum layer is visible near the top. Check the inlet and outlet baffles for cracks or signs of wear, and inspect the distribution box for uneven flow indicators like standing water or wet lines along the field. Observe surface moisture and plants above the drain field; unusually green or soggy patches may indicate drainage issues. A simple surface test—drain a controlled amount of water from fixtures and watch the flow—can help you gauge whether effluent is reaching the field. If you see slow or reversing flow, back up and keep records for the service technician. After you complete inspection, replace the lid securely and restore the area.
Maintenance plan and best practices
Regular maintenance is the foundation of a healthy septic system. Establish a predictable schedule for professional inspections and pumping. Use water efficiently to minimize the volume entering the tank; spread laundry across days and install high-efficiency fixtures where possible. Minimize the use of garbage disposal waste, fats, and oils that can overwhelm the tank’s natural bacteria. Plant vegetation only on the drain field as root intrusion from trees and shrubs can damage lines. Avoid chemical drain cleaners; they disrupt beneficial bacteria and may cause long-term imbalances. If you notice odors, you can temporarily reduce water use and schedule a qualitative check with a licensed pro. Installing a filter on the tank intake can help keep solids out of the tank, but consult a technician before making hardware changes. Finally, maintain clear records of pumping dates, water usage patterns, and any repairs—these notes help professionals diagnose issues more accurately.
When to pump and professional help
Pumping is essential when solids accumulate to the point where the outlet is overwhelmed or a backup occurs. If you notice repeated backups, gurgling sounds, or persistent odors, schedule a professional pump-out. Pumping intervals vary by household size, water usage, and system design; a licensed septic technician can assess tank age, sludge depth, and field condition to establish a maintenance cadence tailored to your home. Do not attempt to pump by yourself unless you have professional training and proper equipment. After pumping, the technician will inspect baffles and the distribution system to ensure everything is functioning and to recommend a long-term maintenance plan. Document the service for future reference and adapt your usage habits accordingly.
Troubleshooting flowchart and quick fixes
When problems arise, start with the simplest checks: ensure lids are secure, curb overflows, and limit water usage while you arrange a professional assessment. If odors persist near drains, switch to a temporary, conservative water use pattern and schedule a diagnostic visit. Quick measures, like avoiding harsh cleaners and reducing kitchen grease input, can stabilize the system while you wait for service. If you experience continuous backups or wastewater in the yard, do not attempt risky DIY fixes; contact a licensed technician immediately. A well-planned maintenance schedule and prompt action can prevent costly repairs and protect your home’s plumbing and soil health.
Preventive maintenance schedule and long-term planning
A proactive maintenance plan saves money and reduces the chance of dramatic septic failures. Create a calendar that includes annual inspections, regular pumping as advised by your technician, and a quarterly review of water use patterns. Keep a log of pumping dates, observed behaviors, and any repairs. Train household members on efficient water use and disposal practices to minimize solids entering the tank. Consider upgrading fixtures or adding low-flow devices to reduce the overall load on the system. Finally, check for tree roots near the drain field and manage landscaping to prevent future intrusion. With a steady schedule, your septic drain system remains resilient for years.
Tools & Materials
- Personal protective equipment (PPE)(Gloves, eye protection, mask as needed)
- Flashlight(For inspecting dark tank areas)
- Sealable container or bucket(For sample collection or small cleanup tasks)
- Basic household tools(Screwdrivers, pliers, wrenches for access lids)
- Non-corrosive cleaning supplies(To clean surfaces without harming bacteria)
- Notebook or digital log(Record pumping dates, observations, and maintenance)
- Approved pumping service contact(Licensed septic service provider)
Steps
Estimated time: 60-120 minutes for inspection; pumping duration varies by tank size and access
- 1
Prepare and safety check
Turn off nearby electrical devices if needed and secure the work area. Put on PPE and ensure no children or pets are within reach. Locate the septic tank access lid and ensure the area is well-lit and free of hazards.
Tip: Always have a second person nearby when opening the tank lid. - 2
Open and inspect the tank access
Carefully remove the lid and look for sludge depth, scum layer, and any cracks in the tank. Do not lean over the opening; stand to the side and check for any signs of gas buildup (odor or bubbles).
Tip: If you smell strong gas, stop and ventilate the area; call a pro. - 3
Check inlet/outlet baffles
Visually inspect the baffles for damage or blockages. A broken or clogged baffle can cause solids to pass into the drain field, leading to failures.
Tip: Do not attempt to remove large solids yourself; a professional should handle it if needed. - 4
Assess the drain field area
Walk the area around the drain field and look for unusually wet, spongy ground, foul odors, or lush vegetation indicating effluent in the soil.
Tip: Keep children and pets away from the saturated zones during inspection. - 5
Document findings and plan pumping
Record sludge depth (do not measure in a risky way), odors, and any visible damage. If pumping is needed soon, contact a licensed provider to schedule.
Tip: Bring photos and notes to your service visit to aid diagnosis. - 6
Schedule pumping and follow-up
Arrange a professional pump-out and an inspection of the distribution box and drain field. After pumping, follow the provider’s recommendations for aftercare and monitoring.
Tip: Maintain a service log and update it after each visit.
Got Questions?
What is a septic tank drain and how does it work?
A septic tank drain is the pathway from your home to the septic system. It allows wastewater to flow into the tank where solids settle and liquids move to the drain field. Proper maintenance helps prevent backups and odors.
A septic tank drain is the pipe network carrying wastewater to the septic system. Regular maintenance reduces backups and odors.
How can I tell if my drain field is failing?
Signs include persistent odors near the drain area, soggy ground, pooling wastewater, or unusually lush vegetation above the field. If you notice these, contact a licensed septic professional.
Look for odors, wet spots, or soggy soil over the drain field and call a pro if you see them.
Should I use septic tank additives or cleaners?
Most authorities advise caution with additives; they are not a substitute for proper pumping and maintenance. Harsh cleaners can harm beneficial bacteria and worsen performance.
Be cautious with additives; they’re not a substitute for pumping and can harm the system.
Can I perform any septic maintenance myself?
Owners can perform safe, non-invasive checks such as inspecting lids and noting surface moisture. Major work, sludge assessment, and pump-outs should be handled by licensed professionals.
You can do basic checks, but major work should be left to pros.
What safety gear should I wear during inspection?
Wear gloves and eye protection; a mask may help in dusty or odorous situations. Never lean over an open septic tank lid.
Gloves and eye protection are essential; avoid leaning over open lids.
What’s the difference between septic tanks and cesspools?
A septic tank stores and treats wastewater before the effluent enters the soil; a cesspool simply collects wastewater without designed treatment or filtration.
A septic tank treats while a cesspool collects wastewater without treatment.
Watch Video
The Essentials
- Inspect regularly and document findings.
- Limit water use to reduce load on the system.
- Avoid harsh chemicals and unproven additives.
- Schedule professional pumping and inspections as advised.
- Maintain a long-term maintenance calendar.